
.jpg?v=1689752710510)
.jpg?v=1689752820181)
.jpg?v=1689752761257)
.jpg?v=1689753360732)
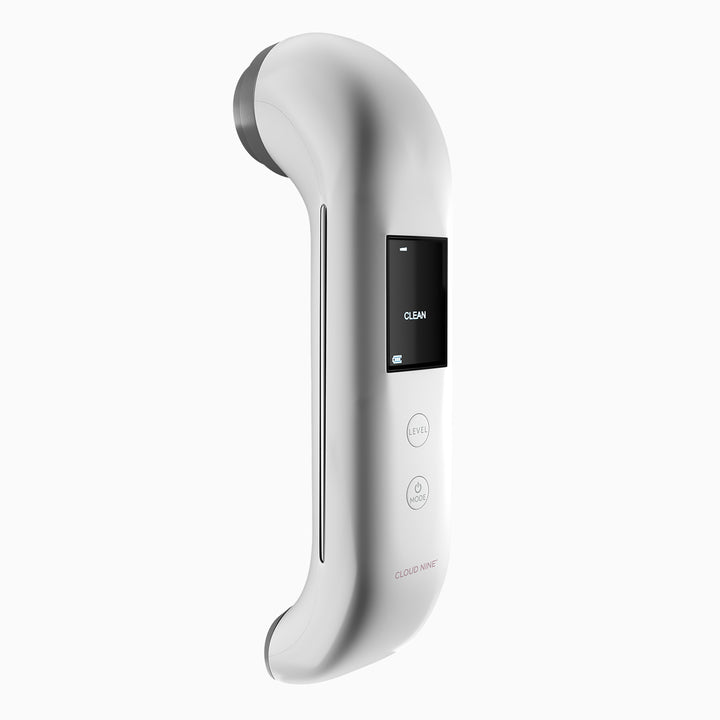
The powerhouse that is the CLOUD NINE Rejuvenate has six professional quality settings to take your skin from a deep cleanse, to light therapy, to EMS treatments. Get comfy as we go through each setting and explain everything you need to know to become your own at-home skin technician.
Step 1: Cleanse
The first step in any skincare routine is to cleanse the skin so that you are working with a blank canvas, whether it's removing a long day's worth of makeup or just cleaning the impurities away. I personally love a balm cleanser for this stage. Something like the ELEMIS Pro-Collagen Balm Cleanser works perfectly. Massage the cleanser into your face with your hands (give yourself some real TLC here) before adding the cotton cleansing pad onto your Rejuvenate and get started with step one. The ‘Cleanse’ adds an extra clean at this stage by cleaning out your pores. This ensures you aren’t trapping any dirt when applying your next layer of products.
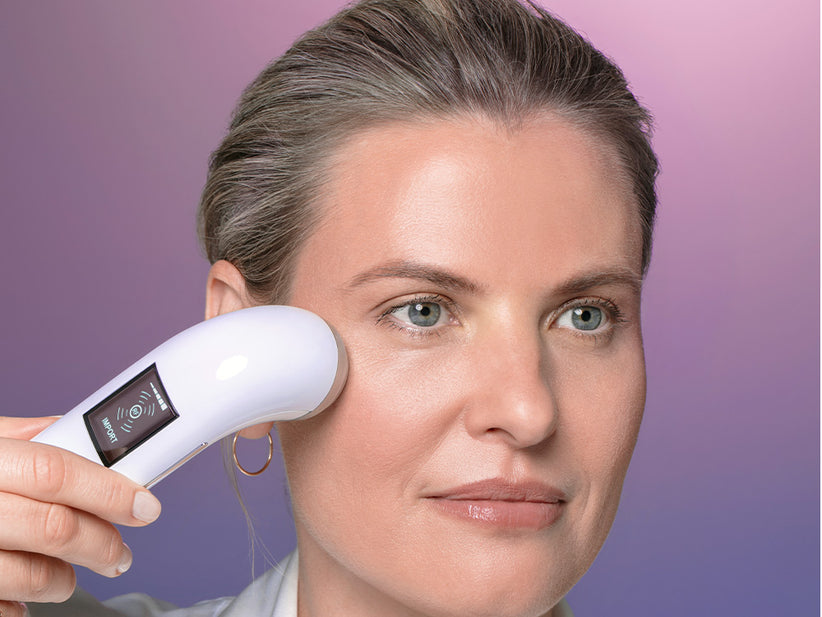
Step 2: Import
Now that your skin is completely clean, it’s time to go in with your products. This is where you can be specific for your skin type. If you are suffering from dehydrated skin in the winter, it could be a hyaluronic acid, or if your concern is acne then a salicylic acid would work great too. Apply your product all over your face and click through onto 'Import' mode to give each part of your face the time and attention it deserves. The features of import mode mean that your product will sink deeper into the skin targeting the cells in the epidermis instead of surface-level skin.
Step 3: Eyecare
EMS stands for Electronic Muscle Stimulation, meaning that it lifts and tightens the skin. A completely non-surgical and non-invasive way of getting that facelift effect without the pain and bill to match! By following the contours of the face (lips to the top of the ear and along the jawline), you are stimulating the muscles to tighten and create that snatched look (think Kim K curves but for your face). Who needs the gym when you can sculpt and tone muscles from home? Feeling the pulses on your face is normal, and the intensity will depend on your skin type and the products on your skin, so each individual experience is unique.
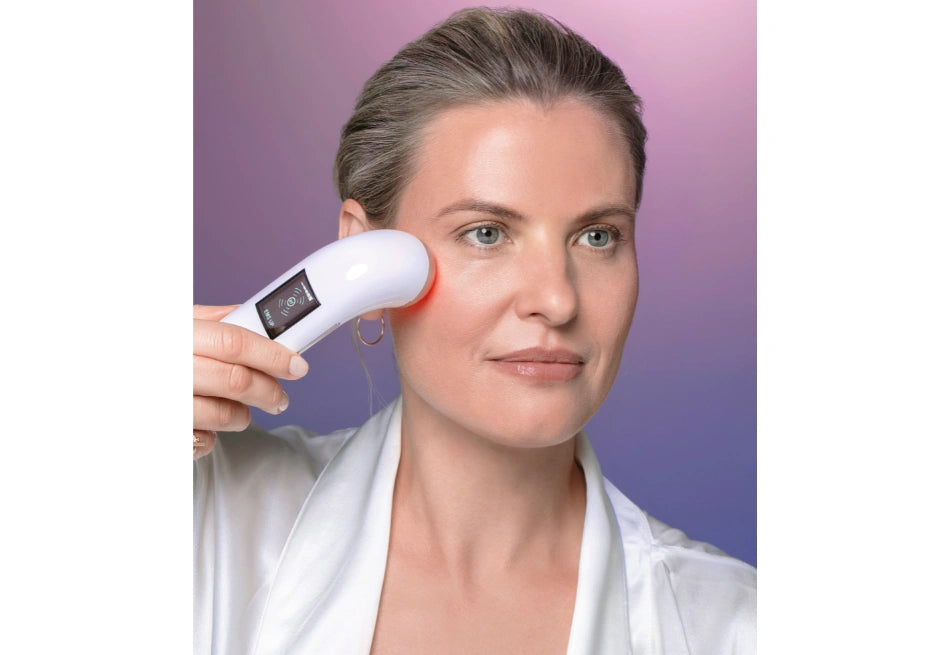
Step 5: Infra-red light
Red Light Therapy is a weapon everyone needs to have in their skincare kit. Whether your skin has started to age or you want to prevent it from happening, red light is a must. The red light is the light that can penetrate deepest into the skin layers, so it has the most lasting effects out of all the light therapies you can use. Red light rays energise the cells stimulating collagen production. Once our bodies reach the mid-twenties, the amount of collagen produced begins to decline, so we all need to do as much as we can to reverse the signs of aging and prevent the early onset.
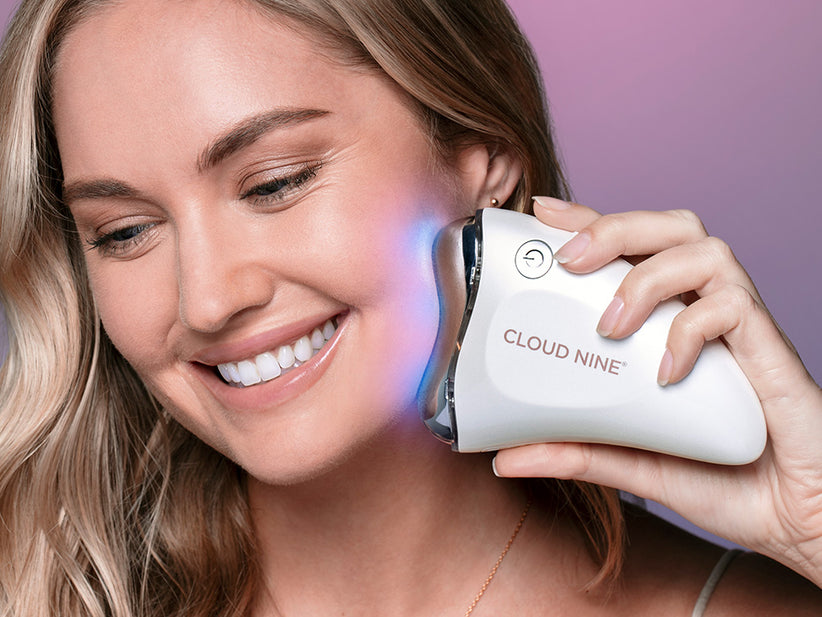
Step 6: Blue light
The final stage of your at-home facial is Blue Light Therapy. This final stage will reduce inflammation and speed up the healing process while fighting acne-causing bacteria. So for those of us who have struggled/still struggle with acne, you can not only help to prevent breakouts by fending off the harmful bacteria but also help to speed up the healing process of acne scars.